Wool Felting for Beginners: A Complete Guide to First Steps and Material Selection
Welcome to the Fascinating World of Felting!
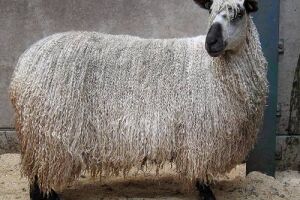
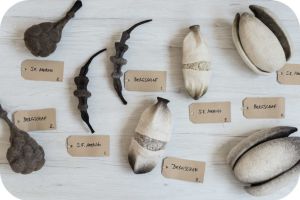
Felting, also known as needle felting or wet felting, is a unique handicraft technique that transforms wool into a variety of creations, from fabric designs and wall art to three-dimensional toys, decorative elements, clothing, and accessories. Felting is a craft where your imagination knows no bounds, allowing you to bring creative ideas to life without the constraints of patterns or templates. It’s important to note that only natural wool has the ability to felt or mat together, forming a dense felted material.
For many beginners, diving into a new craft can seem daunting or even intimidating. However, the lack of rigid rules and the opportunity for free self-expression make felting particularly appealing. This guide is designed to dispel initial fears, answer the most common questions, and help overcome typical challenges faced by novices, as often discussed on crafting forums. The goal of this guide is to help you confidently choose the right materials and embark on your creative journey with ease. The “FELTING” store aims to be a reliable partner and a source of resources and inspiration in this exciting adventure.
Felting: What Is It and What Types Exist?
Wool felting is the process of creating a dense material (felt) by interlocking wool fibers. There are two primary, fundamentally different felting methods: dry and wet. Understanding these differences is essential for any beginner, as the choice of method directly determines the type of item created and the tools required.
Dry Felting, also known as needle felting, involves repeatedly piercing wool fibers with special notched needles. These notches catch and interlock the fibers, gradually forming a dense, compact material. This method allows for high precision in shaping and creating three-dimensional figures.
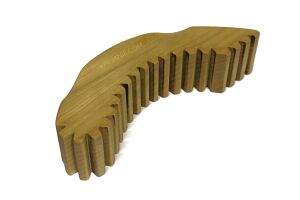
Dry felting is ideal for crafting 3D objects such as toys, detailed sculptures, jewelry, or adding fine details and textures to already-felted items. One of its significant advantages is its portability: dry felting can be done almost anywhere, as it requires no water or complex equipment. However, a common beginner mistake is applying too much force when piercing with the needle, which can break the needle or cause accidental pricks. It’s crucial to use controlled, even pressure, keep the needle vertical, and place the workpiece on a foam mat. Don’t forget to use rubber thimbles to protect your fingers from unwanted pricks.
Wet Felting, in contrast, uses warm soapy water and mechanical action (rubbing, rolling, pressing, or tossing) to shrink and interlock wool fibers. Soap helps the fibers slide against each other, while heat and movement facilitate their bonding into a dense fabric.
This method is ideal for creating two-dimensional or relatively flat items, such as soft scarves, sturdy bags, unique clothing, decorative panels, or felted paintings. The result is a dense, pliable felted material. Wet felting requires a workspace that can accommodate water and soap. A common beginner mistake is using too much soap, making the wool overly slippery and difficult to felt. It’s recommended to use just enough soap to create a light foam without oversaturating the wool.
Clearly distinguishing between dry and wet felting, including their specific applications and common mistakes, is critical to avoiding frustration early on and ensuring a positive first experience. Without this understanding, a beginner might attempt to create a 3D toy using wet felting or a flat scarf with dry felting tools, inevitably leading to failure. Presenting this information in a comparative table provides an effective, clear, and easily digestible overview. This allows beginners to quickly grasp key differences and decide which method suits their desired outcome or available workspace. Detailed and clear explanations prevent frustration from choosing the wrong method or purchasing unsuitable materials.
Comparative Table: Dry Felting vs. Wet Felting
|
Criterion |
Dry Felting |
Wet Felting |
|
Method |
Needle piercing |
Soapy water and friction |
|
Result |
3D shapes |
Flat shapes |
|
Main Tool |
Felting needles |
Soapy water |
|
Required Materials |
Wool, foam mat |
Wool, soap, water |
|
Workspace |
Can be done anywhere |
Requires access to water |
|
Typical Products |
Toys, brooches, 3D details |
Scarves, bags, clothing, panels |
By providing this foundational knowledge in an accessible format, the “FELTING” store empowers customers to make informed decisions from the start of their creative journey. This reduces potential failures and dissatisfaction due to mismatched expectations, guiding them toward the right tools and materials available at the store, increasing the likelihood of a successful first project and further skill development.
Where to Start? Top Beginner Questions and Answers (Based on Crafting Forums)
Starting any new craft can feel overwhelming, and felting is no exception. It’s important to understand that the questions and initial challenges faced by beginners are extremely common and shared by countless experienced crafters who were once in their shoes. The following practical advice is based on collective wisdom and discussions found on various felting forums and communities. This section aims to provide actionable solutions to the most frequently asked questions.
- How can I speed up the felting process, especially at the beginning?
The initial stage of felting, particularly when creating a new item, is often described as the most time-consuming and challenging. Achieving initial density can feel slow. To significantly speed up this critical early phase, experienced crafters recommend using multiple needles simultaneously, typically three, held together in a multi-needle tool. This increases the number of piercings per stroke, helping the wool compact much faster and contributing to a fuller, more voluminous shape for toys. At the initial stage, use needles #32 and #36, as they best facilitate quick fiber interlocking. Each needle size may come in additional configurations, such as star-shaped or twisted needles. - How do I know if felting is going correctly and the wool is compacting?
A key sensory indicator of proper felting is the characteristic “crunching” sound when piercing the wool with a needle. This sound indicates that the fibers are actively interlocking, and the material is compacting as needed. The absence of this sound may suggest that the wool is too loose or that the technique requires further work with initial needles. When the initial needle starts to struggle to penetrate the wool, switch to the next needle size, such as #38 (a medium needle), which also comes in configurations like “star” or “twisted.” - How do I prepare wool for felting to make it felt better?
For smooth, “ribbon-like” wool (combed top), where fibers are aligned in one direction, it’s helpful to slightly tousle and “fluff” it before starting. Gently tease it apart and loosely comb or ruffle it. This disorganizes the fibers, making them more receptive to interlocking during felting. However, the best solution is to choose specialized wool for dry felting, such as Maori or Bergschaf, which comes as carded wool, speeding up the initial felting process. - How do I create a dense core for a toy or 3D item?
To ensure a sturdy and stable base for 3D creations, start with small, manageable strands of wool. Tightly twist or roll them to begin. Once this initial core becomes dense, gradually add more wool around it, building the desired shape and density layer by layer. - Controlling material quantity: Why is “better to add than to remove”?
A common mistake is using too much wool at the start of a project. It may be tempting to take a large amount, but overestimating can lead to an oversized or misshapen item. It’s much easier to add small amounts of wool to build volume and refine shape than to remove excess wool after it has started to felt. Always start with less wool and gradually add as needed. This approach saves material and prevents frustration. - Planning the work: Do I need a sketch, and how do I measure material for identical parts?
If creating an original or complex toy, it’s highly recommended to make a simple sketch beforehand. This helps visualize the final product, plan proportions, and anticipate potential challenges. When crafting symmetrical components, such as legs, ears, or eyes, it’s critical to prepare the exact same amount of wool for each part at the same time. Once one part is felted, it becomes incredibly difficult to accurately gauge and replicate the exact amount of wool used for subsequent identical parts. - In what order should I felt the parts of an item?
The general rule for assembling felted items is to felt all parts in a logical sequence, typically starting with larger, foundational components and gradually moving to smaller, intricate details. This ensures a stable base and easier attachment of smaller elements. - How do I check the quality of felting and ensure the item is dense enough?
To determine if an item is sufficiently and well-felted, firmly squeeze or press it. If the item holds its shape, doesn’t deform, doesn’t spring back, and doesn’t feel loose, it indicates that the fibers are well-interlocked, and the item is properly felted. - What’s important at the final stage of felting?
As the work nears completion, the distance between needle piercings should become very small, requiring a finishing or polishing needle, such as #40 (available in various configurations). This fine-tuning creates a smooth, even surface and refines details. Thoroughly inspect the item from all angles to ensure there are no noticeable bumps, uneven areas, or protruding fibers. Throughout the felting process, but especially toward the end, continuously rotate and reposition the item. This ensures even felting on all sides, preventing distortion and creating a product with uniform density. - How do I create a fluffy effect on a felted item?
To achieve a fluffy effect, use reverse felting needles, often called “reverse needles.” - How do I speed up the process for large sculptural projects or filling patterns on panels?
For such purposes, needle holders with 7 or 8 needles are typically used.